Fall is here!!! Kinda...I'm dying to slip on my boots again, and the forecast still shows temps in the 70s. So, with warm California weather still hanging on, I thought I'd share my new favorite frozen dessert recipe. And listen up! It's the easiest recipe in the world. No, really. It has two ingredients and results are the consistency of Wendy's frosty. Ok, now you're listening...
Showing posts with label Recipes. Show all posts
Monday, October 28, 2013
Friday, August 9, 2013
Summer fruit tart
I probably should be blogging about my wedding and showing you honeymoon photos, but FIRST, a recipe. Summer is one of my favorite times to experiment with cooking. Blackberries and peaches and everything yummy is in season, and the days are longer so the oven can come on when it cools off at night. This galette recipe comes from Martha Stewart's Baking Handbook (a Bible of baking tips and drool-worthy photography - shout out to Erin for gifting me this as a wedding present!).
The actual recipe uses apricots and blackberries, but I substituted for what I had (peaches from the Natomas farmers market and plums from a neighbor's tree. I also used Martha's regular pie crust recipe, because I didn't have cornmeal for the pâte brisée recipe. So, it's a total adaptation - I can never really truly exactly follow a recipe to its exact specifications. I blame my mother for this trait. :)
Ingredients
For the pie filling, mix the following:
- Ripe or overripe summer fruit (peaches, blackberries, apricots, plums, etc.), sliced
- A handful of sugar
- A few tablespoons of flour (or more depending on how wet your fruit is)
For the crust:
- 2 1/2 cups all purpose flour
- 1 tsp. salt
- 1/2 tsp. sugar
- 1 1/4 stick butter
- 1/2 cup ice water (very cold - this is the secret!)
Mix the flour, salt and sugar. Cut in the butter until the mix is crumbly and not lumpy. Pour in the ice water to form a dough.
Roll out the dough in a large circle and place in a pie plate. Pour in the fruit mix and bring in the edges of the dough in overlapping folds. Brush the edges with melted butter and sprinkle with sugar (optional but a really good idea). Bake about one hour or until the crust is golden brown. Let set at least 10 mins before serving. Serve with vanilla ice cream (also optional and also a really good idea).
This tart is also really good the next day after spending a night in the refrigerator.
Yum, yum, yum. I want to make another one...
Wednesday, November 21, 2012
Fall Recipes: Pumpkin bread
Thanksgiving is tomorrow, so it's only fitting that all of my posts have been about food this week, right? :)
I like to think of certain foods as a bit magical. Some are more magical than others. Why? Because they can disappear quickly, into thin air, leaving only tiny crumbs strewn across the kitchen counter. This pumpkin bread is one of those magical foods. Plus, it employs a "two-bowl method" as I like to call it (meaning, the recipe only requires two mixing bowls -- one for dry ingredients and one for wet ingredients). Done and done.

Preheat the oven to 350 degrees F.
For the wet ingredients, you'll need:
- One 28 oz can of pure pumpkin
- 3/4 cup vegetable oil
- 4 eggs
For the dry ingredients, you'll need:
- 3 1/3 cup of flour (or 3 cups white flour plus 1/3 wheat)
- 2 cups of sugar (I used 1 cup brown sugar, one cup white)
- 1 1/2 tsp. salt
- 2 tsp. baking soda
- 1 tsp. nutmeg
- 2 tsp. cinnamon
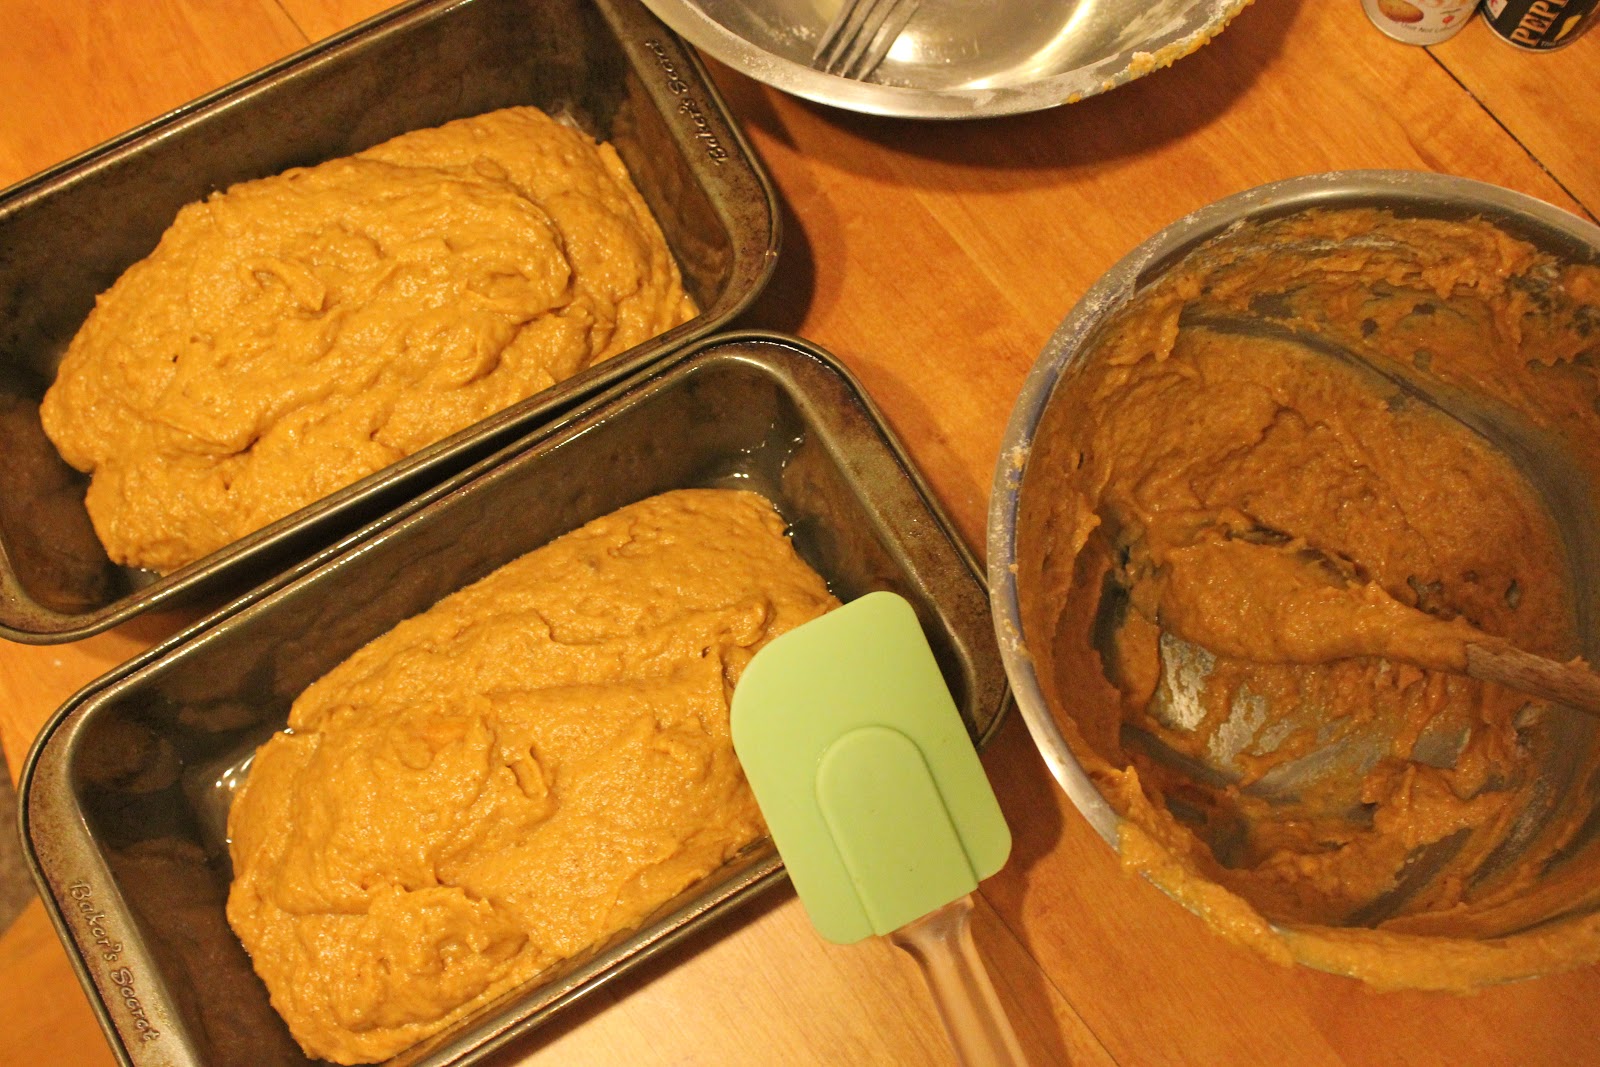
Mix both in their respective bowls, then add the dry ingredients to the wet. Stir until smooth, and spread evenly into 2 loaf pans. Bake for 1 hour or until knife comes out clean from loaf.
You can totally leave the recipe at that. But I got a little fancy and put on my baker's thinking cap. I chopped and caramelized some walnuts by sautéing them with smidgen of butter and a generous handful of brown sugar (Paula Deen would be so proud) until they were coated in sweetness. Walnuts never tasted so good!
I like to think of certain foods as a bit magical. Some are more magical than others. Why? Because they can disappear quickly, into thin air, leaving only tiny crumbs strewn across the kitchen counter. This pumpkin bread is one of those magical foods. Plus, it employs a "two-bowl method" as I like to call it (meaning, the recipe only requires two mixing bowls -- one for dry ingredients and one for wet ingredients). Done and done.
Pumpkin bread
Preheat the oven to 350 degrees F.
For the wet ingredients, you'll need:
- One 28 oz can of pure pumpkin
- 3/4 cup vegetable oil
- 4 eggs
For the dry ingredients, you'll need:
- 3 1/3 cup of flour (or 3 cups white flour plus 1/3 wheat)
- 2 cups of sugar (I used 1 cup brown sugar, one cup white)
- 1 1/2 tsp. salt
- 2 tsp. baking soda
- 1 tsp. nutmeg
- 2 tsp. cinnamon
Mix both in their respective bowls, then add the dry ingredients to the wet. Stir until smooth, and spread evenly into 2 loaf pans. Bake for 1 hour or until knife comes out clean from loaf.
You can totally leave the recipe at that. But I got a little fancy and put on my baker's thinking cap. I chopped and caramelized some walnuts by sautéing them with smidgen of butter and a generous handful of brown sugar (Paula Deen would be so proud) until they were coated in sweetness. Walnuts never tasted so good!
Then, I mixed up some frosting with a cup of confectioners sugar, combined with a splash of milk and another splash of vanilla extract, and drizzled the icing on each loaf after they cooled from the oven. On top, I sprinkled the candied walnuts.
And there you have it! I brought one of the loaves to work with me last week, and it was happily devoured. Thanks to my mom for this original recipe. :)
Saturday, November 17, 2012
Fall Recipes: Butternut squash soup
Last weekend, I went a little crazy in the kitchen. Something about that crisp chill of fall and that early hint of winter in the air makes me want to bustle around from mixing bowl to oven all day. So that's just what I did. I took out my old handwritten recipe book and whipped up some creamy butternut squash soup and some dense pumpkin bread. Our apartment sure smelled like fall all day! Because it's our first full rainy weekend in the area, I'm sharing my soup recipe to start. Get ready to chow down and warm up...
Butternut Squash Soup
This soup recipe is good for three reasons. It's cheap, it's simple and it's soul-warming. What more could you ask for? Well, maybe that the soup had magical powers. But who's to say it doesn't? First, you'll want to gather some veggies and a plump butternut squash (which happens to be one of the cheapest items at the grocery store/farmers market this time of year).
- Slice the squash into four sections, brush with olive oil, sprinkle with salt and place face-up in a roasting pan. Turn the oven to broil and let it heat up.
- In the meantime, finely chop up the following: half of an onion, 2 ribs of celery, 1 large carrot, and 1 pear (or apple, depending on your preference or what happens to be in your fridge at the time). Sauté these with 1 tbsp. of butter in a large saucepan until the onions are clear and the veggies are soft.
- Stick the squash in the oven to broil until it's roasted on the edges and until you can easily poke a fork through it (about 10-15 minutes). Ah, look how lovely it looks...
- Set the squash aside to let it cool slightly. In the meantime, add 3 cups of chicken broth to the sautéed veggie mix (I used 3 chicken bouillon cubes, dissolved into 2 cups of water + 1 cup of milk to make the soup a tad more creamy) and bring everything to a boil.
- While the squash is still warm, take a paring knife and peel off its skin. Cut the squash into chunks and add it to soup mix. Boil until soft.
- Then (here comes the messy part), purée the soup using a blender, hand blender or food processor until smooth--but not too smooth. Add salt, pepper and a dash of nutmeg to taste. Serve immediately, and enjoy!
Tuesday, June 12, 2012
Red velvet birthday cake
Red velvet is my all-time favorite cupcake flavor and I’ve always
wanted to make the bigger, badder cake version, especially since I turned a
bigger, badder 24 on Monday.
So, my mom and I whipped up our own version based on this recipe with cream cheese frosting (mmmm....). It called for TWO 1-ounce bottles of red food coloring! We
only used one and the batter turned out very red (as in, will-stain-your-tongue-and-fingers-and-counter-top red), even after completely
baking. We agreed that next time
we attempt this cake, we’re going to go the anti-dye route and use beets, which can naturally give the cake a red color. This no-red-dye recipe by Sophistimom
looks delectable.
As family and friends devoured the dessert around the table that evening, we
got to discussing why in the world a red cake became popular. It turns out, the
history of red velvet involved food coloring way back in the late 1800s. John A. Adams, whose family founded The Adams Extract
Company marketed his dye products on posters with illustrations of a thick crimson,
velvet (which meant fine-crumbed back then) layer cake. With every purchase, those Southern and
Midwestern mamas received two free bottles of Adams red dye. Clever, clever, Mr. Adams.
No matter how you slice it, cake is cake...and I'll eat it!
Continue reading for the complete recipe...
Monday, November 29, 2010
The best chocolate chip cookie recipe OF ALL TIME
![]() |
| They really do look as good as in this picture |
I discovered the recipe in college when my roommate Jessica brought the book How to Boil Water to our apartment one weekend. I laughed at the title, because we were both always cooking and baking; anyone who came over to our place expected something yummy set out on the table or inside the refrigerator. But if not for a late-night cookie craving, I may have never stumbled upon this recipe. In fact, I think it was the only one I ever used from the book.
You can find the recipe on The Food Network or follow it below by clicking "Read More." I'm sure Santa will appreciate these on Christmas Eve!
Subscribe to:
Posts (Atom)